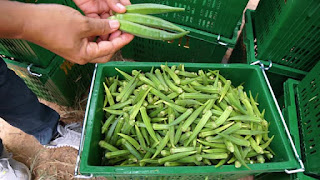
How to Plant Okra in Your Backyard
How to Plant Okra in Your Backyard: A Simple Guide for Home Gardeners
Okra, also known as "ladies' fingers" or Abelmoschus esculentus, is one of the easiest and most rewarding vegetables you can grow in your backyard. It thrives in warm climates, is packed with nutrients, and grows fast—making it a perfect addition to any home garden. Whether you're an experienced gardener or just starting, learning how to plant okra in your backyard can offer you fresh produce right at your fingertips.
In this blog post, we’ll take you through everything you need to know: from choosing the right variety to harvesting your pods.
Why Grow Okra at Home?
Before we dig into the how-to, let’s talk about why okra is a great crop for backyard gardening:
- Easy to Grow: Okra requires minimal attention once established.
- Nutrient-Rich: It’s a great source of vitamins A, C, and K, as well as fiber and antioxidants.
- Multiple Harvests: With proper care, okra can yield pods every few days during peak season.
- Space-Saving: Okra grows vertically, so it doesn’t take up much ground space.
Step 1: Choose the Right Variety
There are many okra varieties to choose from. Some of the most popular for backyard gardens include:
- Clemson Spineless: Fast-growing, thornless, and widely available.
- Burgundy Okra: Deep red pods with ornamental appeal.
- Emerald Okra: Tender pods with a rich green color.
Step 2: Timing is Everything
Okra loves heat and sunlight. For best results:
- Plant when the soil is warm—around 18–24°C (65–75°F).
- In most regions, this means planting in late spring or early summer, after the last frost.
Step 3: Prepare the Soil
Okra isn’t too picky, but it grows best in well-drained, loamy soil with a pH between 6.5 and 7.5. Here’s how to prep your soil:
- 1. Choose a sunny spot that gets at least 6–8 hours of sunlight daily.
- 2. Clear the area of weeds and old plant matter.
- 3. Loosen the soil with a hoe or fork to a depth of 12 inches (30 cm).
- 4. Add compost or aged manure to enrich the soil with organic matter.
Step 4: Planting Okra Seeds
You can start okra directly in the ground or in seed trays. For best results, plant directly in the soil. Here's how:
- Soak the seeds overnight to speed up germination.
- Plant each seed about 1 inch (2.5 cm) deep.
- Space the seeds 12–18 inches (30–45 cm) apart in rows that are 2–3 feet apart.
- Water the soil gently but thoroughly.
Step 5: Watering and Care
Okra plants are drought-tolerant once established, but young seedlings need consistent moisture.
- • Water regularly during the first few weeks—keep the soil moist but not waterlogged.
- • Once the plants are 6 inches tall, water less frequently but deeply to encourage root growth.
- • Mulch around the base of plants to retain moisture and suppress weeds.
Step 6: Fertilizing
While okra can grow in average soil, a little boost can improve your harvest.
- • Use a balanced fertilizer (like 10-10-10 NPK) once plants are 4–6 inches tall.
- • Alternatively, apply compost tea or fish emulsion every 3 weeks.
- • Avoid high-nitrogen fertilizers—they promote leaf growth over fruit.
Step 7: Pest and Disease Control
Okra is fairly pest-resistant, but you may still encounter:
- • Aphids: Spray with neem oil or a mixture of water and mild dish soap.
- • Flea beetles and stink bugs: Handpick them or use organic insecticidal soap.
- • Powdery mildew: Avoid overhead watering and space plants properly.
Step 8: Harvesting Okra
Okra grows very fast, especially in warm weather.
- • Harvest pods when they are 2–4 inches (5–10 cm) long—usually 50–60 days after planting.
- • Pick every 2–3 days to encourage new growth.
- • Use a knife or scissors to snip pods cleanly from the plant.
Step 9: Storing and Using Okra
Freshly harvested okra can be stored in the fridge for up to 4 days. To preserve it longer:
- • Blanch and freeze it for soups and stews.
- • Dry or pickle okra for snacks or traditional dishes.
Backyard Bonus Tips
- • Companion plants: Grow okra near peppers, basil, or melons. Avoid planting it with sweet potatoes.
- • Vertical space: Okra can grow up to 6 feet tall! Stake the plants if necessary.
- • Save seeds: Leave a few pods on the plant to dry at the end of the season for next year’s planting.
Conclusion
Planting okra in your backyard is not just easy—it’s incredibly rewarding. With minimal care, you can enjoy a bountiful harvest of fresh, healthy pods that taste even better when home-grown. From soil prep to the final stir-fry, growing okra connects you with nature and puts real food on your table.
So grab your gloves, soak those seeds, and start your backyard okra garden today. Your future self (and your dinner plate) will thank you!


